I’ve been building PCs for 25 years and during that time, PC components have evolved massively in performance and cooling techniques. Personally, I’ve only ever used the stock air cooler for my CPU, but had seen a growth in All-in-one coolers.
Custom water cooling solutions have been around for a long time, but the complexity, cost and risks associated with these, meant they are often more effort than they are worth.
Understanding that most consumers are chasing a simple, quiet and effective cooling solution, all-in-one cooling solutions have definitely arrived with plenty of RGB so they look good at the same time.
An AOI cooler features a closed-loop system, meaning you don’t need to be concerned about leaks, solving one of the biggest risks associated with custom solutions.
The system works by mounting a pump to the CPU, which allows cooled liquid to pass over the CPU and lower its operating temperature. If you’re into overclocking your CPU to extract more performance, you can do so with an AIO and stay within a healthy thermal envelope.
The heated liquid is then circulated through tubing up to a radiator. This takes liquid and forces it through thin fins, allowing the maximum airflow over the liquid. The cooling is provided by fans (either 2 or 3 depending on the size of the radiator you chose). With the liquid-cooled, it then flows back towards the pump and is ready to cool that CPU, hence the closed loop system.
There are lots of options on the market and after lots of research, I settled on the ASUS ROG Strix LC II 360 ARGB – White Edition. This features a Triple 120mm fan design, and RGB lighting on the fans and the pump, but doesn’t have an LCD display like some others.


Having been through the upgrade process, I will recommend that if you’re building a new PC, it’s definitely advised that you buy an AIO at the time, rather than doing what I did, which was basically deconstructing your PC to install.
Given the weight of the CPU and to ensure a solid connection, you need to remove the Motherboard from the case to attach a mounting brace on the back, before installing the AIO.
This process saw me remove the stock Intel CPU cooler, the GPU, the existing fans and all the cables connected to the motherboard (Power, USB, RGB etc). At this point I was able to extract the screws securing the motherboard, giving access to the back of the board where the brace was mounted.
With the backplate in place, it was time to clean the thermal paste off the CPU, then mount the pump (with pre-installed paste), then the securing pins that pulls the pump tight on the processor to ensure good thermal transfer.
The next job was time to re-install the motherboard in the case and consider carefully where the cooling tubes would run. This means making a decision about the location of the radiator. I went with a top-mounted, which ensures that if there are any air bubbles in the system, they reside at the radiator, not at the pump.
With the Lian Li V2 RGB cables (12-pin motherboard and 3×6 pin GPU) in place, it was obvious I needed to run the tubes to the left, so the placement was made easy.
After many more connections and more time than I’d like to admit on cable management, it was time to turn on the system with the new AIO cooler installed.
The first boot resulted in lights on the CPU and the system sounded like it was booting, but I got nothing on the display. It ran for a few seconds, then shut off. Not a great start, but I wasn’t ready to give up. I turned on the system again and it seems the pump was firing, although these tubes are not clear, so you’re really guessing how well the water flow is working.
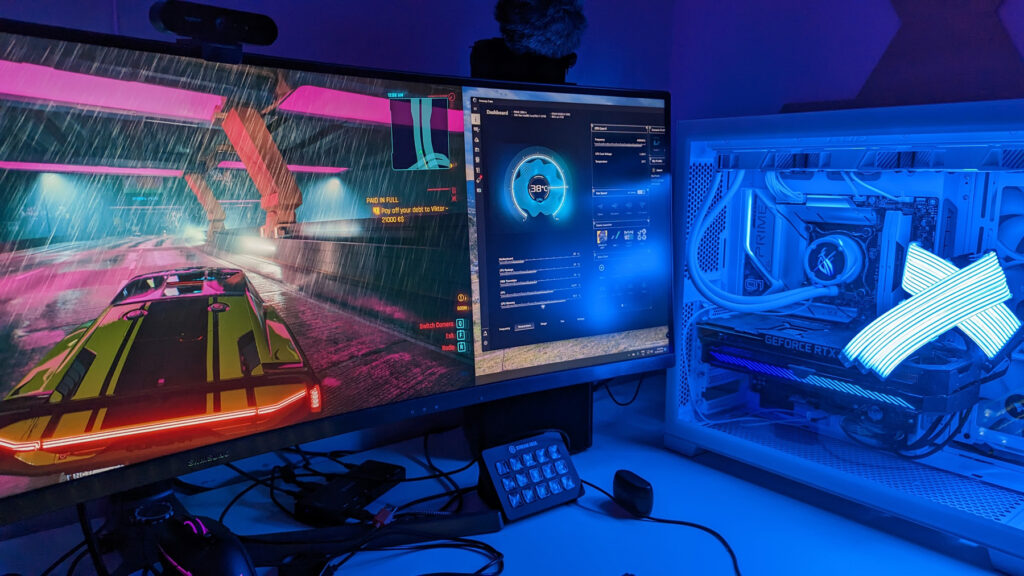
After a couple of false starts, the system posted and made its way to the desktop. I then fired up the Amory Crate application from Asus (my motherboard and now AIO manufacturer). This showed a CPU temperature much lower than I’d seen before.


At full load, when running a game like Cyberpunk 2077 or rendering a video, the CPU temps were consistently 15-20 degrees cooler than the stock Intel air cooler. This combined with a quieter operation, the couple hrs of effort to upgrade to an AIO definitely felt worth it.
At rest, the temperature now sits around 32-35℃, but the more impressive part is that at full load, the most I’ve seen is 46℃ and that was for a few seconds, more regularly it peaks around 40℃. I find this to be impressive, considering this CPU regularly seen 50°C – 75°C under load before the upgrade.
What you don’t get is a noise ramp as the processor loads up and delivers the top-end of its performance capabilities, how much you value this, will be an individual decision. With my PC on the desk beside me, the difference in noise is really the difference between reading headphones and not.
Sitting back and reflecting on the project, I love the way the new AIO cooler looks, particularly in white, and matches the aesthetics of the rest of the build. I was keen on having a pump that featured an LCD display that could constantly display the temperature underneath but couldn’t really justify the additional $50-$100.