Home Automation continues to enhance our lives, taking away the annoying, inconvenient and routine activities we humans would rather do without. The potent combination of a solution that inlcudes hardware, software and services, can make for an experience that feels, not just convenient, but life-changing. Adding something like a Roomba to your home makes you wonder how you ever did without one, as it allows to you mentally disconnect from that chore, instead it just gets done for you thanks to technology.
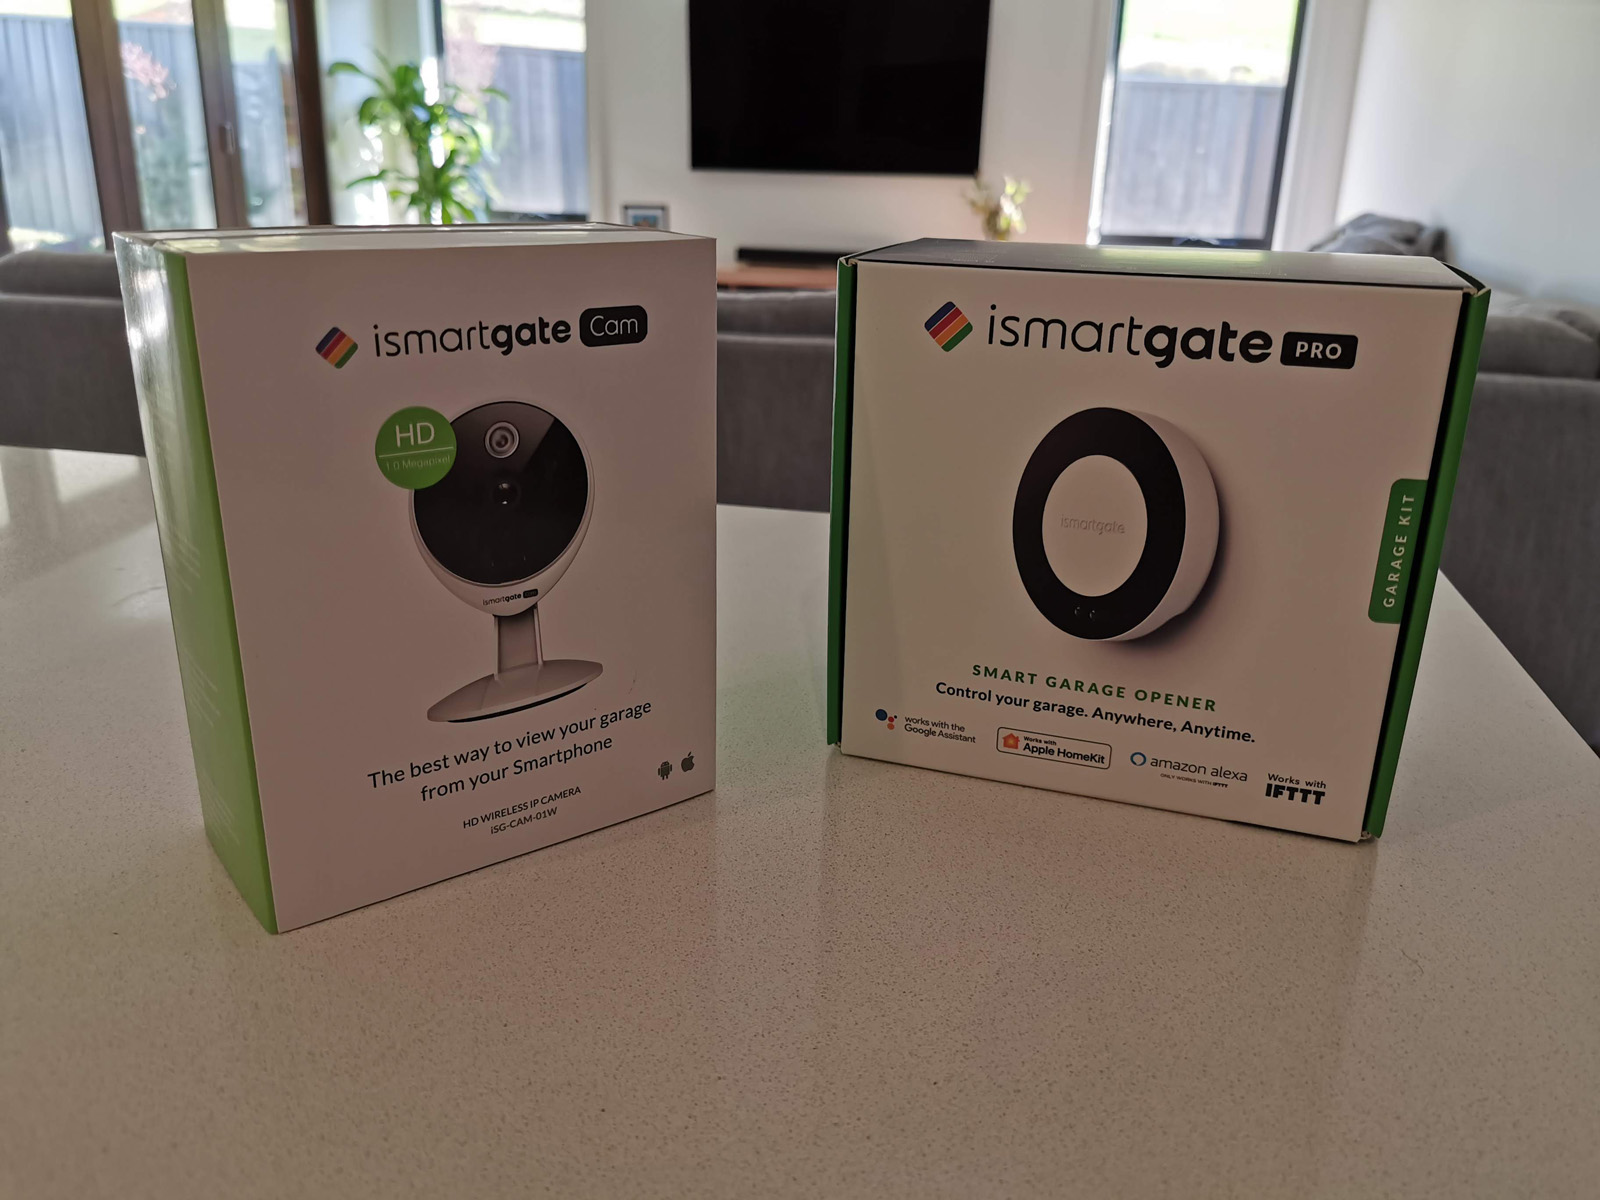
After reviewing the Gogogate 2 Ultimate Garage Kit last around this time last year, I’ve now upgraded to the latest implementation, the iSmartGate PRO. Most of us have been happy to press a button in our car and have our garage door open for us. While that was a good step in the 2000s, it’s old news now and we should expect more from today’s technology. Thankfully the new implementation has integrations with voice assistants and the critical IFTTT that can enable powerful automation experiences like automatically opening and closing the garage door when you approach or leave a specified zone.
This particular model can be wired to control up to 3 garage doors, handy for those who’ve Lambo’d out of their Bitcoin wallet.
DESIGN
Efficiently sized for smaller rooms
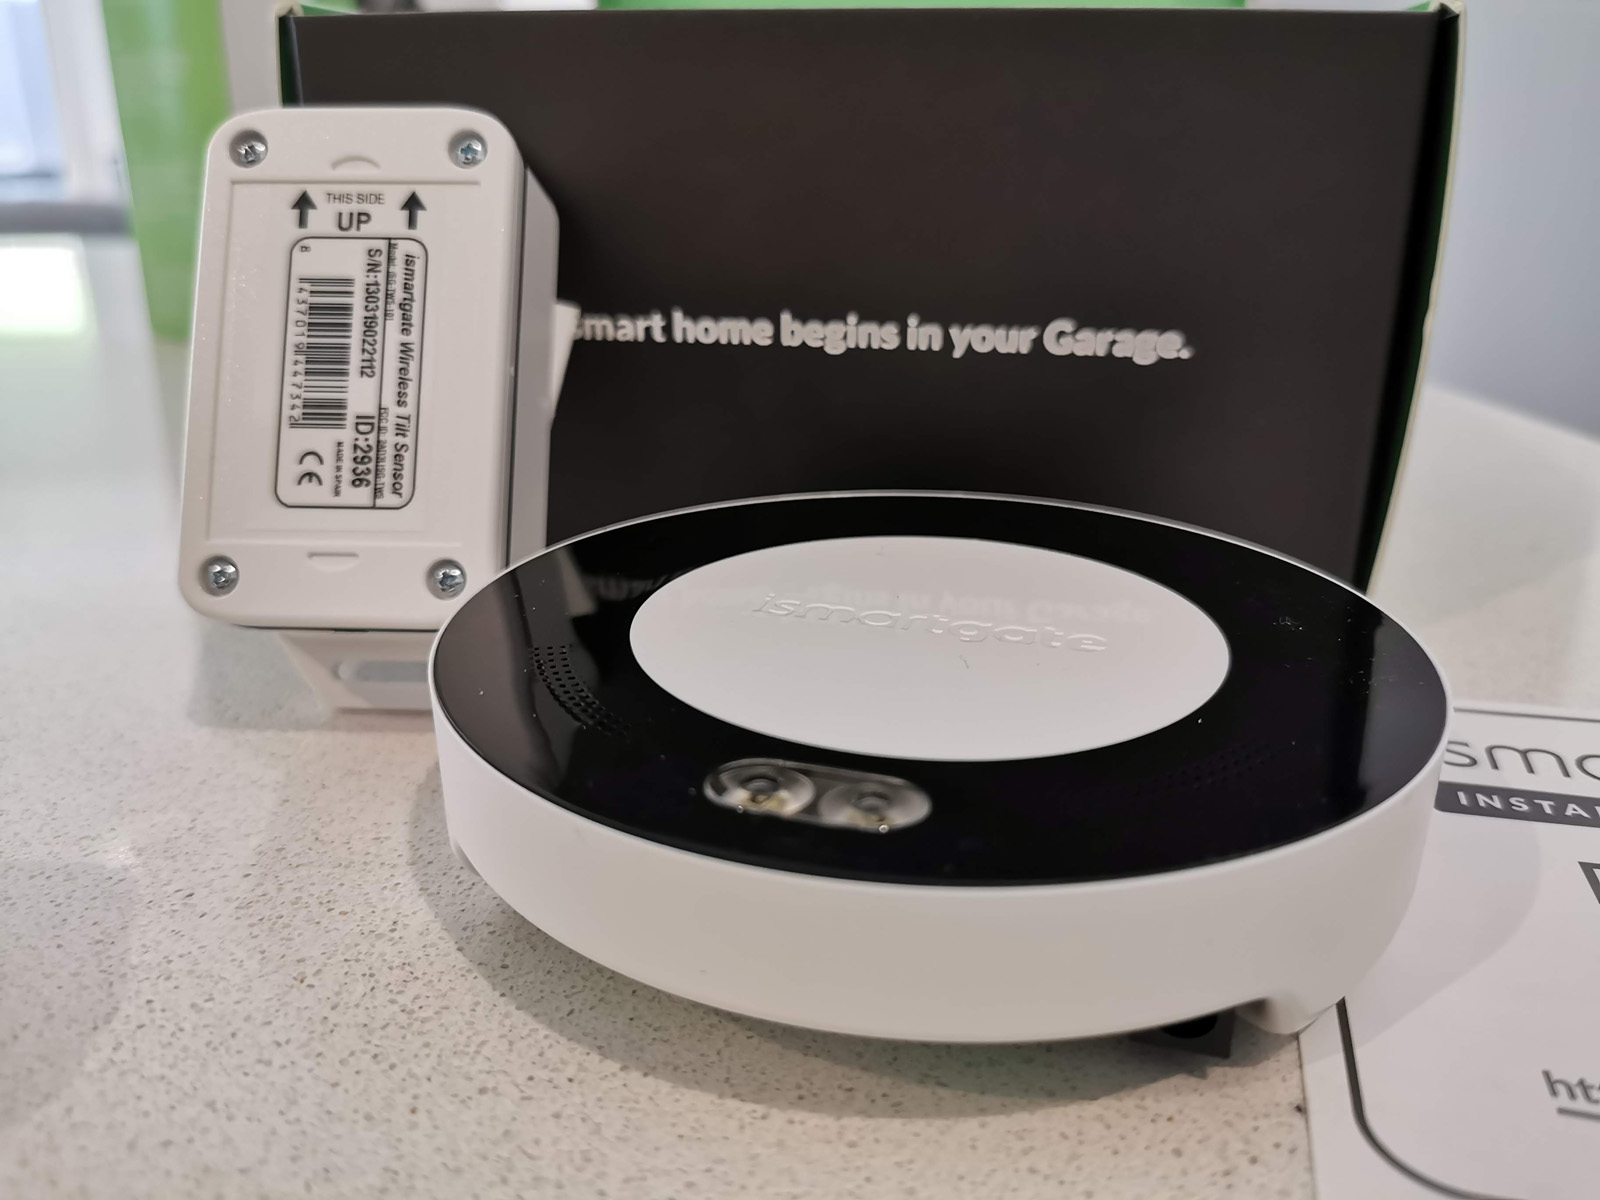
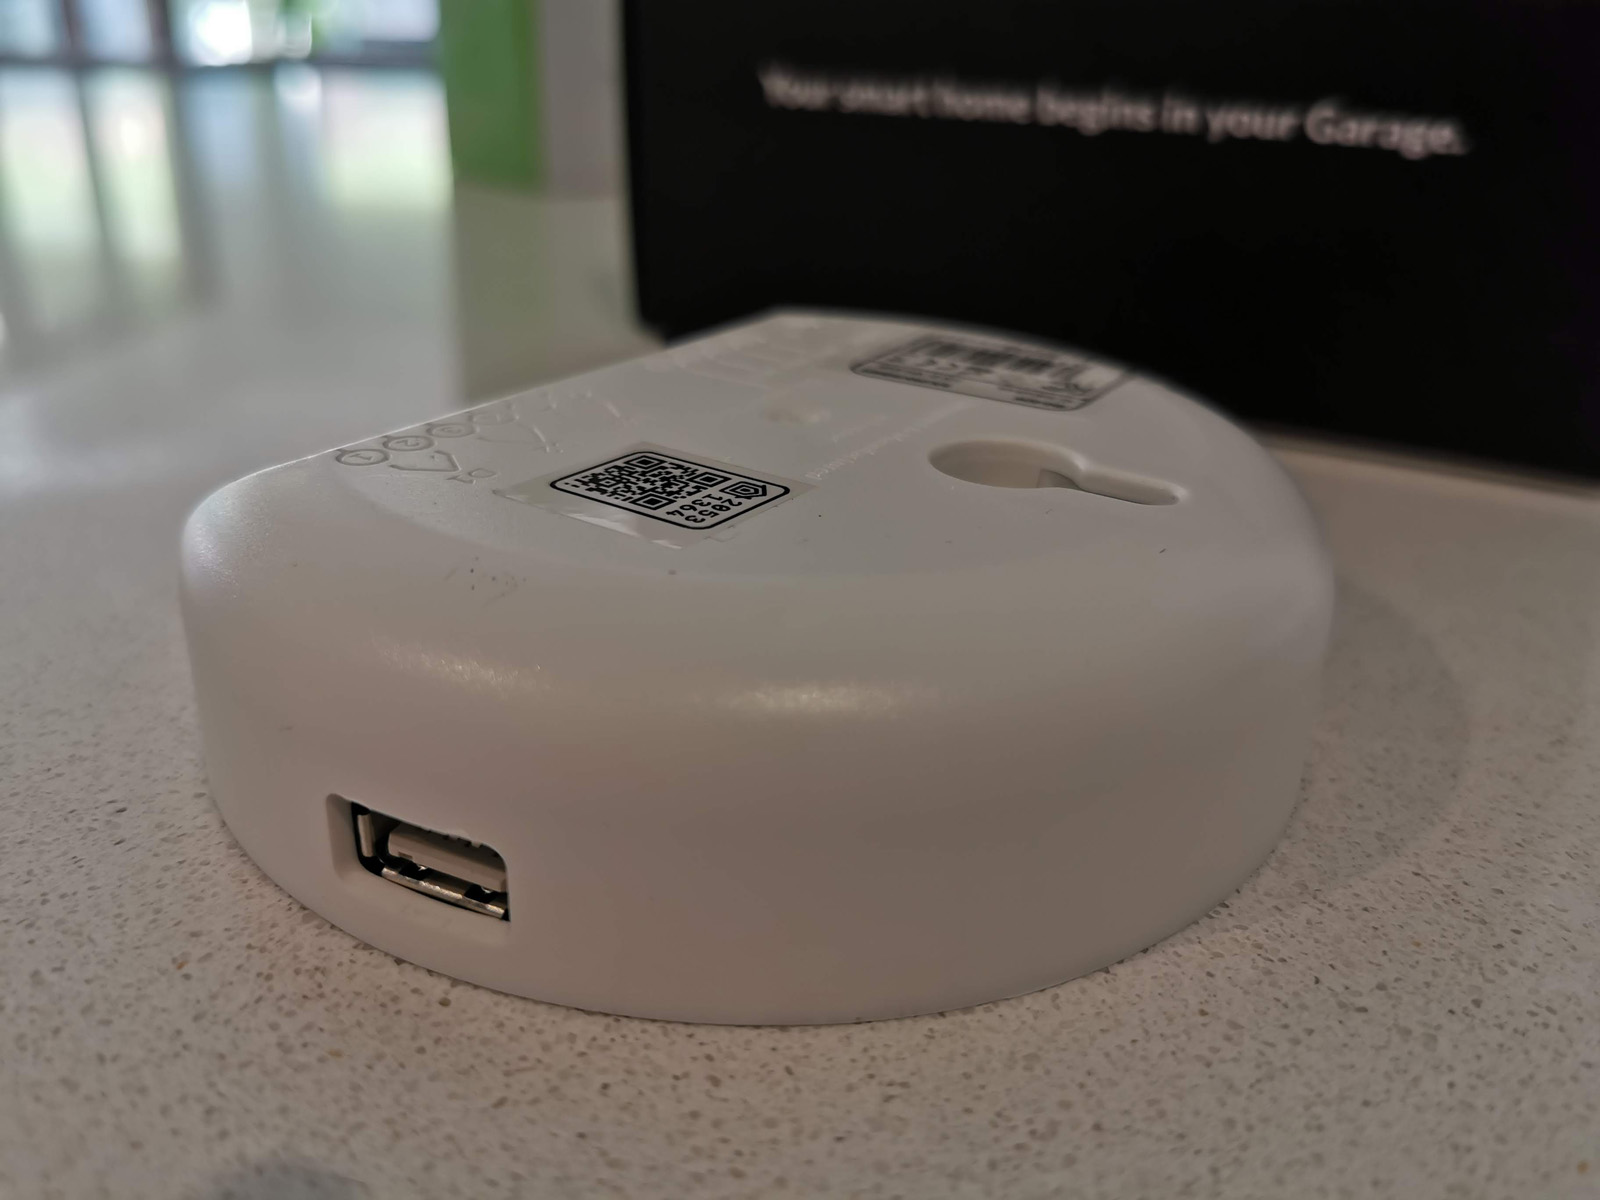
With a new version comes a completely new design. The main controller for the iSmartgate is round, almost like a Nest that you place on top of your garage door opener. This design is much more attractive than what we saw last year which was a combination of white an green. Now the circular face features the white center section, with a subtle ismartgate logo embedded, but it’s the surrounding black section that’s more interesting. Underneath this black surface are LEDs that let you know the status of the device, as well as dual LEDs at the base to light the environment it’s placed in.
The device features speakers which are an important feature to alert people nearby that the door is closing. Depending on your garage door, it may or may not be able to detect objects in its path. The good news is the volume of this alert and the actual sound played is completely customisable. That’s fantastic as the default alert is fairly annoying, albeit effective. It’d be a nice touch to replace it with something like ‘Attention, the garage door is closing, please move out of the way immediately.’
Demo
Here’s a quick video of the product in action. Google Assistant is called from my Huawei P30 Pro and asked to open the garage door. As you can see, it works quickly after confirming a security PIN. Most of the time when I drive in our Honda CRV, I’m using Android Auto. This means I can press the button on the steering wheel to activate voice, then give it the same voice command. Again I confirm the pin and by the time I reach my house, the garage door is open and waiting for me to enter.
SETUP
Installation isn’t for the light hearted
Installation of the iSmartgate was pretty straight forward, but that depends on a couple of key things. I’ve done this before with the last model, so was familiar with the process of removing the garage door opener (4 scews). The internal wiring didn’t have to be changed, just rewired to the new controller.
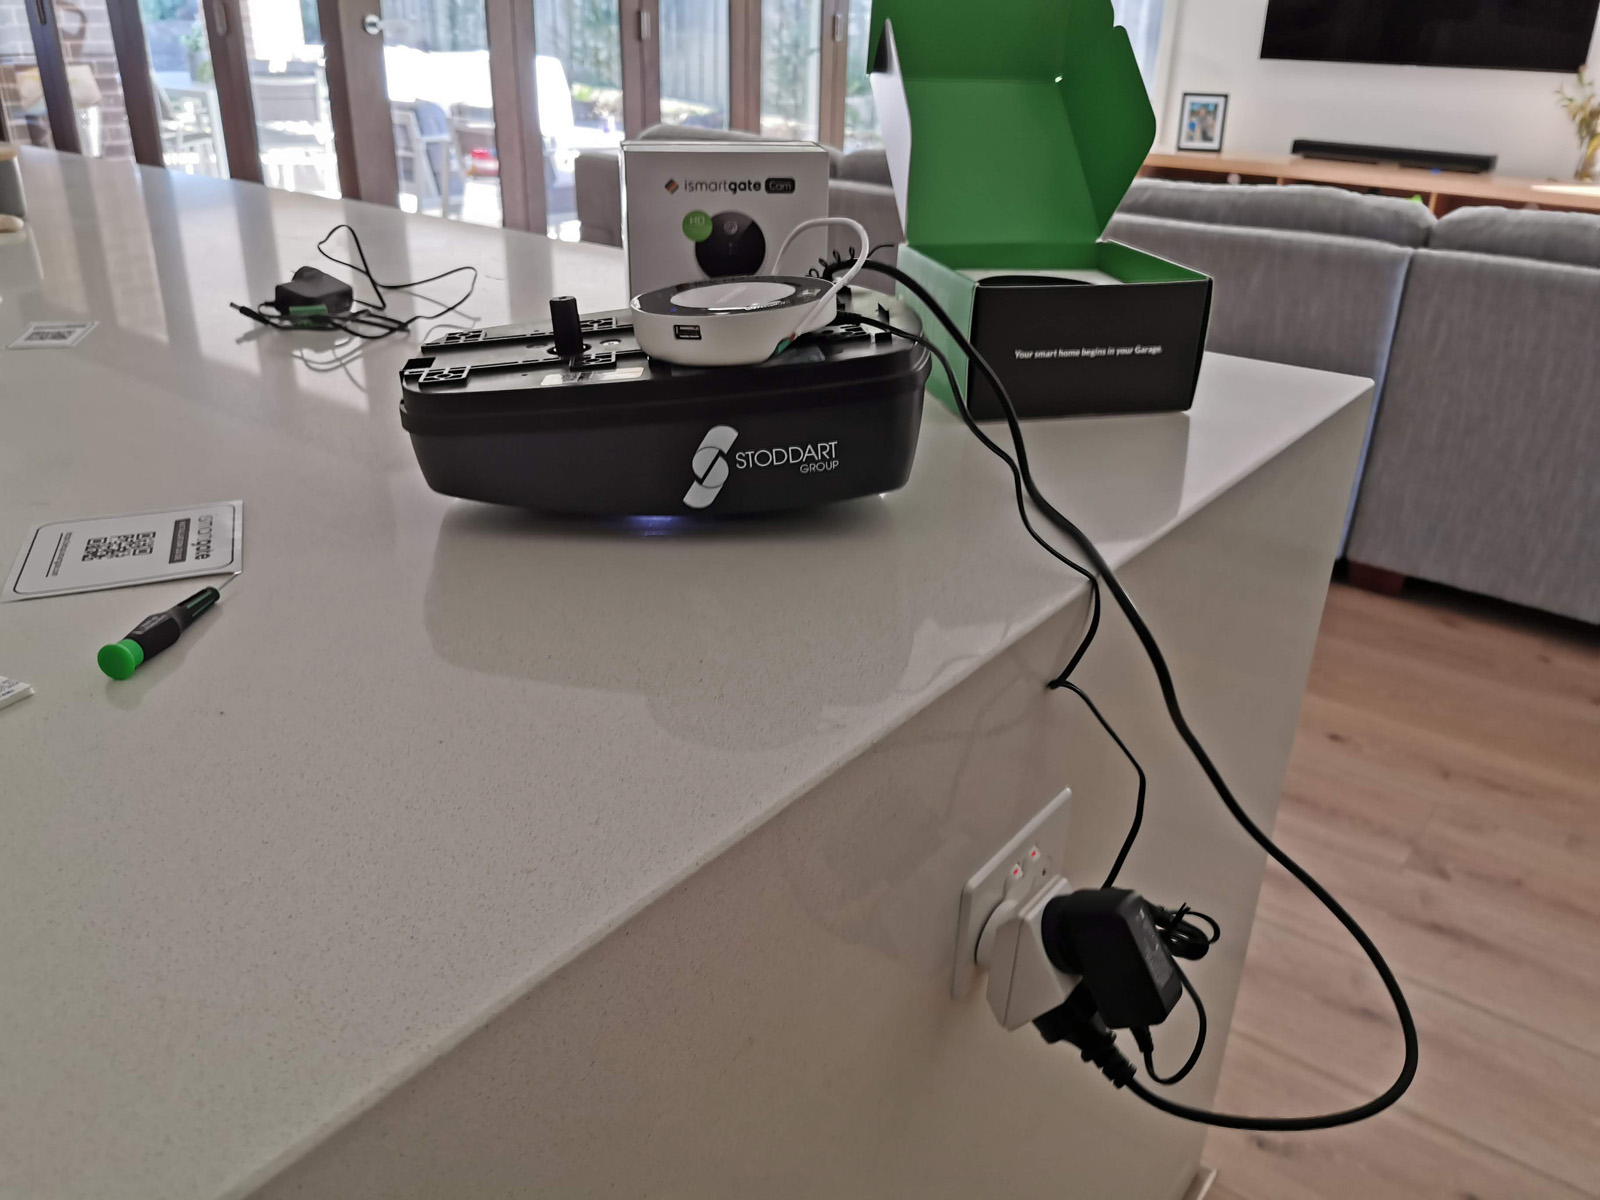
If you were installing this for the first time, your first step is to find out what brand and model of garage door opener you have. This sounds easy, but externally, mine was rebadged as Stoddart Group, but is actually a Centurion Avanti. You’ll need to know this before buying to ensure your model is compatible.
Following the guide, it takes a matter of minutes to work out which wires need to connect to which terminals. After you do that inside the garage door opener, you simply run the wire out, then use a flat head screw driver to connect the read and white wires to the iSmartgate controller.
Personally, I tested it on the bench in the kitchen first, before bolting everything back together, once it worked through the mobile app, I was comfortable to reassemble. This can save you a lot of time up and down a ladder.
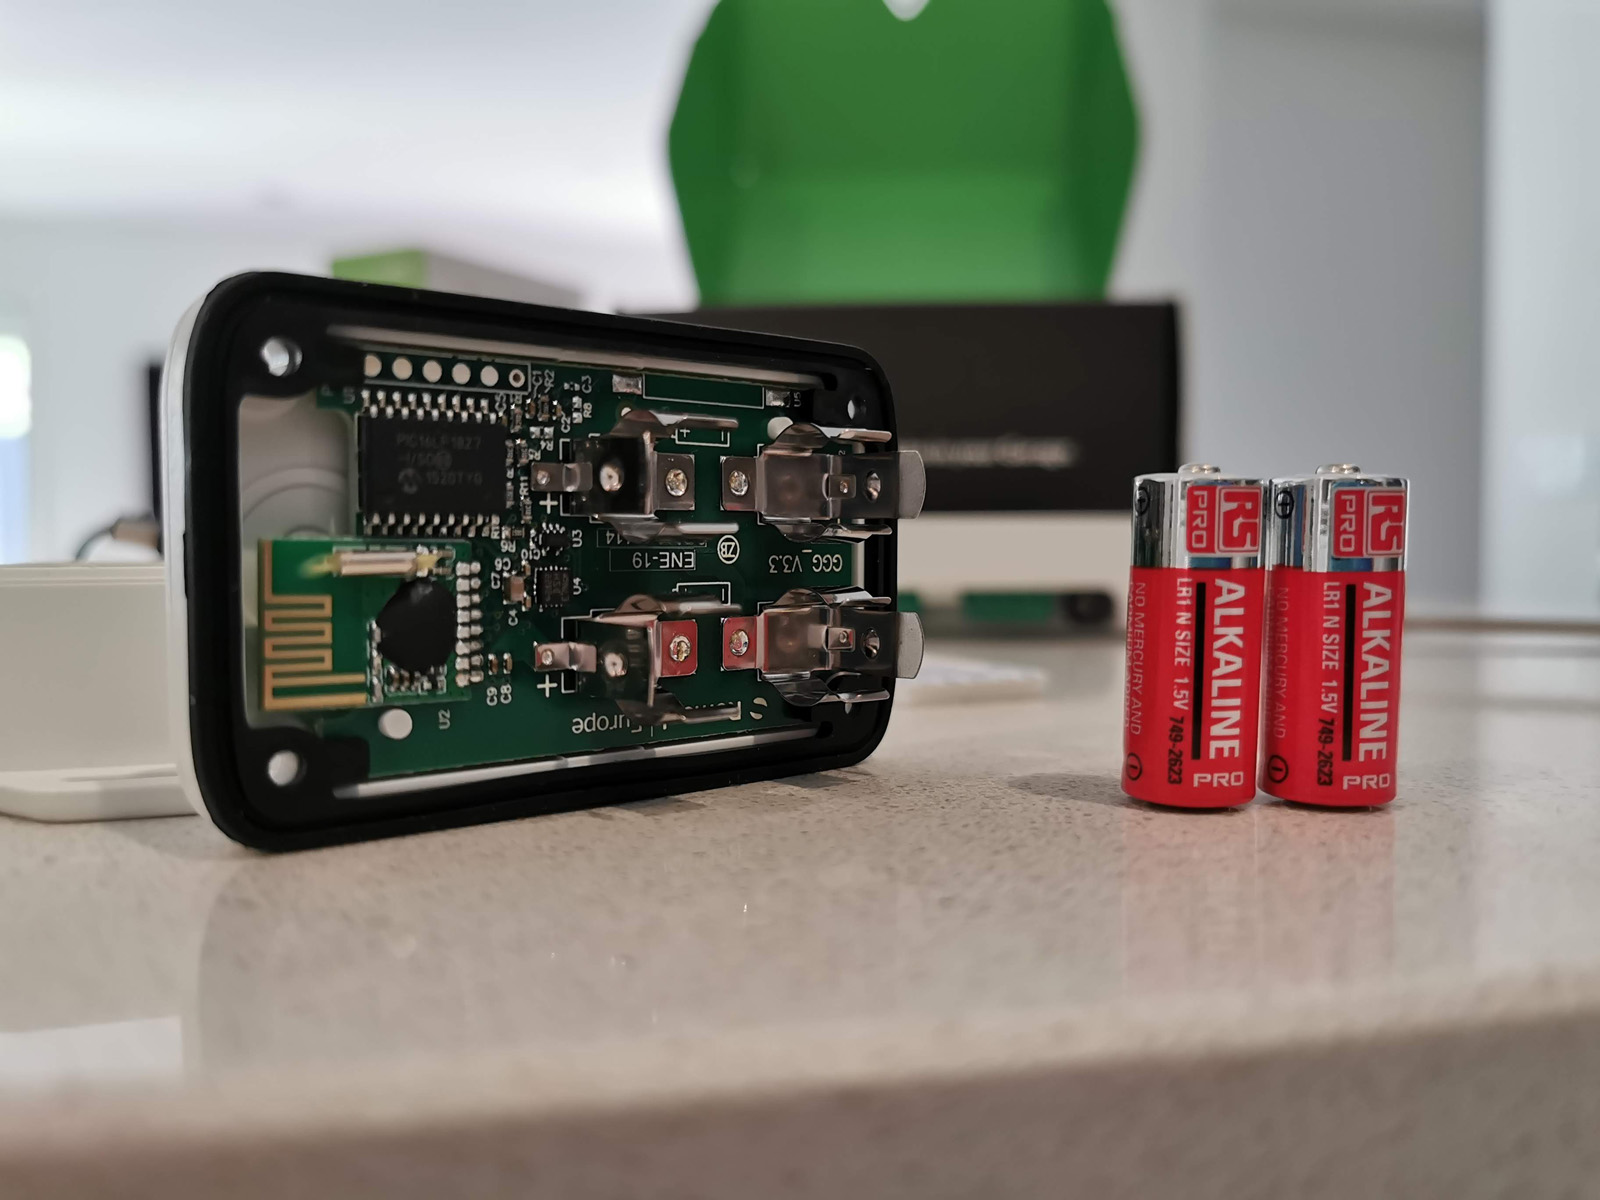
The second component of installation is the garage door sensor. This runs on 2x 1.5v batteries that are simple to install (4 phillips head screws), once you’ve got that sorted, just peel off the backing from the double-sided tape and place on the back of the garage door when closed. In the vertical positon, this tells the system (wirelessly) that the door is closed. This is visualised through the mobile app and if the two get out of sync, just press your normal garage remote to get them back in sync (a 1-time deal).
Once you have all that setup, your garage door is now connected and can now be opened and closed through the iSmartgate mobile app. Now you’re ready to start expanding the functionality by configuring the video camera feed, IFTTT and voice assistants like Google Assistant, Alexa, or integrate with Apple’s Homekit, depending on your preferred platforms.
It is important to know that you can add permissions for multiple users, enabling your husband, wife, kids, parents, or even Airbnb guests to have access.
FEATURES
Connected and capable
The iSmartGate PRO has an impressive list of features, a reflection of a maturing product, one that understands the wants and demands of modern connected home users.
Connected services
One of the biggest changes in this implementation of the product is the support for connected services. With Apple HomeKit, Google Assistant, Amazon Alexa and IFTTT integration, this product can be connected to the rest of your IoT ecosystem. The iSmartgate app is pretty polished, providing easy access to control your garage door, check on the garage events, the temperature is the what gives this system it’s smarts, turning your garage into an entry point of your smart home.
Video feed or static images
When you buy the iSmartgate PRO, it includes an IP camera that now integrates to the system, albeit with a separate app for setup. Once configured, you can add the direct camera video feed to the iSmartgate app and see if you’re garage door is open or closed. This is great if you remotely open the garage door for a courier to deliver goods securely into your garage, you can keep an eye on them.
If you’re simply trying to confirm if the door is open on not, you can leverage the Open/Closed status in the mobile app. To begin the app uses placeholder images, but I suggest you do what I did, which is capture images of your own garage in both open and closed states, adding a real personal flavour to the app.
Users
Naturally your home is used by your family, so naturally, you need to grant access to other family members. iSmartgate allows as many as 10 users for free which should be plenty for most households. If you have a need, say in business, to exceed that, you can purchase either a ‘100 users’ or Unlimited.
One of my favourite use cases for having a connected garage door is for deliveries. As we continue to grow comfortable with buying more online, many of those purchases are larger, like furniture or electronics like TVs etc. Having the ability to open the garage door to allow the courier to deliver it to your dry, secure garage is a great attribute of the device.
By now, many of us have connected doorbells. Personally, I use Ring to speak to couriers and now I can ask them to put the item in the garage. Some products are too expensive to leave on the doorstep and too big to fit in the mailbox, but thankfully the garage is now a possibility.
After briefing the courier what is about to happen, I simply switch apps on the phone and open the garage door. It’s now that the camera feed is perfect, allowing you to monitor the unknown person you’ve just let into your garage. It’s a scary concept initially, but the camera feed helps alleviate that anxiety. After doing it a couple of times and seeing the system work, you understand how powerful this connected world we live in, really can be.
ISSUES
Room for improvement
Geolocation
One potential use for the iSmartGate is to configure your garage door to automatically open when you approach your home or close when you leave. This is achieved by using IFTTT integration and the Garage and Door channel. When you enable these 2 Applets, you define your location and a perimeter in which to trigger the event. The issue I have is that the theory doesn’t always match reality.
On more than 1 occasion, I have arrived home, had to open the door manually, be back in the house, sitting on the couch watching TV, only to hear the garage door open. It’s opening as my location had finally registered with Google, then IFTTT and commanded iSmartGate to open the door. One potential solution is to expand the range broader, to give more time for the data flow to occur. The issue is that I have friends that live nearby, around the corner in fact, so if I’m going to visit them, I don’t want my garage door to open.
While this service relies heavily on location data from your phone transferring through Google and then onto IFTTT, its hard to point the blame at iSmartGate for this not working as intended. I also don’t think it’s unreasonable for users to expect this to work, given the Google Assistant and IFTTT logos on the box.
Video camera setup
When you set up the iSmartGate camera, you can choose to use an ethernet cable, or wireless connectivity. The instructions included in the box explicitly say to not use the Ethernet on the initial setup. I went for the wireless setup as the iSmartGate connects wirelessly, so looking to use ethernet seemed like a backwards step and I think a majority of users would choose the wireless option.
Despite having the same branding, the iSmartGate Camera setup requires the download of a separate camera app. Once installed and connected, you can get the live stream from the camera to your phone, you can take photos or even video recordings. The tricky part is that to integrate the video feed of the camera to the primary iSmartGate app, you need to enter the IP address of the camera.
So where do you find the IP address? You may have to connect it to your router via Ethernet, then use your router’s webpage or use the included CD (nope, I don’t have a drive either), to detect the IP of the camera. If you do manage to get through this, you can enter the IP address of the camera, into the iSmartGate app and you’ll see the live camera feed of your door. This feature is awesome but is way more of a hassle to set up than it should be.
At this point, I should probably detail my frustration that the video plugin that enables the camera feed to be shown in the app. This costs A$39.95 for a 3-year licence, this absolutely needs to be included for free, particularly with the purchase of the higher tier systems. You’ll get a free 30-day trial to check it out.
PRICE & AVAILABILITY
How much and when can you get one ?
The Ismartgate is available in a number of versions, which means you have a decision to make when selecting the right product to meet your needs.
In Australia, the iSmartgate openers are available from Remsol from https://shopaustralia.ismartgate.com/43-ismartgate-openers
ismartgate LITE kit for garage – A$199.00
Kit for garage door. Includes Wi-Fi controller and waterproof wireless tilt sensor. ismartgate LITE will remotely open, close and control your garage door through HomeKit, Google Home, iFTTT or with native iOS/Android App. Includes key features such as video, user management compatibility., automatic open/close with GPS location or time (with iFTTT).
ismartgate LITE kit for gate – A$219.00
Kit for gate. Includes Wi-Fi controller and waterproof wireless magnetic sensor. ismartgate LITE will remotely open, close and control your gate through HomeKit, Google Home, iFTTT or with native iOS/Android App. Includes key features such as video, user management compatibility, automatic open/close with GPS location or time (with iFTTT).
ismartgate PRO kit for garage – A$279.00
Kit for garage door. Includes Wi-Fi controller and waterproof wireless tilt sensor. ismartgate PRO will remotely open, close and control your garage door through HomeKit, Google Home, iFTTT or with native iOS/Android App. Includes key features such as video, user management, audio player, 3 doors control, compatibility with wireless and wired sensors.
ismartgate PRO kit for gate – A$299.00
Kit for gate. Includes Wi-Fi controller and wireless magnetic sensor. ismartgate PRO will remotely open, close and control your gate through HomeKit, Google Home, iFTTT or with native iOS/Android App. Includes key features such as video, user management, audio player, 3 gates control, compatibility with wireless sensor and wired sensors.
Ultimate LITE Garage Kit – A$299.00
The most complete solution for the garage of your smart home. Integrates with Apple HomeKit, Google Home natively and Amazon Alexa through iFTTT. Remotely control, monitor and watch your garage door from anywhere from your Smartphone. Includes the ismartgate LITE device, waterproof wireless garage door sensor and wireless indoor IP camera with night vision.
Ultimate LITE Gate Kit – A$349.00
The most complete solution for the gate of your smart home. Integrates with Apple HomeKit, Google Home natively and Amazon Alexa through iFTTT. Remotely control, monitor and watch your roller door and gate from anywhere from your Smartphone. Includes the ismartgate LITE device, waterproof wireless magnetic sensor and waterproof wireless outdoor IP camera with night vision.
Ultimate PRO Garage Kit – A$379.00
The most complete solution for the garage of your smart home. Integrates with Apple HomeKit, Google Home natively and Amazon Alexa through iFTTT. Remotely control, monitor and watch your garage door from anywhere from your Smartphone. Includes the ismartgate PRO device, waterproof wireless garage door sensor and wireless indoor IP camera with night vision.
Ultimate PRO Gate Kit – A$399.00
The most complete solution for the gate of your smart home. Integrates with Apple HomeKit, Google Home natively and Amazon Alexa through iFTTT. Remotely control, monitor and watch your automatic gate from anywhere from your Smartphone. Includes the ismartgate PRO device, waterproof wireless gate sensor and wireless outdoor IP camera with night vision and motion detection.

OVERALL
Final thoughts
I see a future where almost everything we interact with is connected. Adding connectivity to your garage door is one of the most natural extensions to your smart home. While your first IoT device may not be in the garage, it is something you should consider.
The Gogogate 2 reviewed last year was a great starting point, but the additional features in regards to voice assistant support, really show a maturing of the product. These integrations really allow your garage (and ultimately access to your home), to be available under the conditions you set, at the days and times of your choice and the ability to have 2-way comms means you cater for that courier, delivering those larger items, assuming it doesn’t require a signature.
Make sure you buy the right product for your needs as there is quite a range in product pricing depending on the feature set you’re after and the number of garage doors you’re looking to connect. It is also important to recognise the support for other IP-based camera hardware, rather than force you down the path of buying their own solution. This is a very custom-focused move and one that’s really appreciated.
If you’ve already got a connected doorbell, lights, blinds, air conditioner, security and entertainment systems, then you’ll likely find it a very easy sell to add the iSmartGate to your list. If you’ve never ventured into the world of IoT, then let me assure you, it’s well worth the small time investment to work through the setup. It’s really something you’ll do over a weekend and get to enjoy the benefit for years to come.
Being able to command physical things, like your garage door, to open or close by using your voice is really an amazing experience. It’s something you can use when your hands are full, or just to show off to friends. Whatever your individual use case, I love this product and its a great addition to our increasingly connected lives.
What’s the thinking on updating from a GoGoGate 2? I’m very happy with mine and have voice control through IFTTT. Integration with Google Assistant would be great, but I’m mindful of not wasting money or creating e-waste.
Buy the new one and sell your old one. eWaste concerns – solved.
Hi Jason, I’m in the process of installing an automated gate so I’m looking for a method of operating the gate remotely from my phone for deliveries as your do. I have considered the Ring to function as the call button but feel that there is a massive overlap between this and the iSmart products.
It seems to be a blinding oversight that Remsol missed the simple idea of offering a 2 wire connection of a push button contactor to function as a call button by visitors. As you say operating 3 doors and or gates would seem to be for only a rare few so it strikes me that they missed a significant marketing opportunity by not simply allowing any unused wired sensor terminals to be configured as call buttons and then assigned to any of the configured openers.
This would in effect completely replace the need for something like Ring which as far as I’m aware are not able to operate openers. Perhaps it’s just a firmware and app update to achieve this but from my experience no manufacturer other than Tesla are open to users suggestions no matter how beneficial so I’m not holding breath.
Lastly what are the logistics of locating the main control unit in relation to the garage door and a gate located 40 meters away? Should I leave the control unit in the garage and run 2 wires to the gate sensor and 2 for the gate opener plus Ethernet for the camera if not confident using wifi? I’m thinking to run a six wire shielded cable to the gate so I can also connect a gate call button and connect that to the third door/gate sensor as a temporary call solution – I assume that would work?
Apologies for the long winded comment. Cheers, Peter.
Hi Folks,
Note Google Assistant integration is now broken.
Appears to be related to this issue:
https://support.google.com/assistant/thread/1376645?hl=en&msgid=17995043
I also have a stoddart garage door opener and can not work out the wiring configuration. Any tips on that to connect? I even search for centurion Avanti not working.